


How do solar panels get installed?
You can divide the solar panel installation process into three stages:
- Proposals, contracts and permitting
- Installation of your home solar panel system
- Permission to operate and commissioning
Because local jurisdictions and utilities can have very different processes and requirements for solar, the timing of the first part of the process can vary widely from as little as two weeks to as much as six weeks or more! The actual physical installation of the solar panel system shouldn’t take any more than two to three days barring any delays on the part of the contractor or any scheduled inspections. Commissioning should only take a few hours, but like permitting, getting permission to operate from your local jurisdiction and your utility can vary widely as well from a few days to a few weeks.
Proposals, contracts and permitting
The first step in the solar panel installation process is gathering quotes or proposals. Just like any home improvement project, it’s always a good idea to get several quotes from different contractors to compare your options. Read more about choosing a solar contractor here.
Home solar quotes can be complicated and hard to understand with lots of facts and figures and each contractor is likely to present different information in a different format. To make matters more difficult, contractors may propose different system sizes, different equipment, different warranties and make different assumptions on their energy and financial models. Make sure that you understand each proposal and are comparing the right information. See how Sentinel’s process reduces variations and makes it easier for you to compare quotes.
In addition to preparing a quote for your home solar system, your solar contractor should also evaluate whether any upgrades are required to prepare your home for solar. Learn more about those upgrades here.
Once you’re fully comfortable that you’ve got a reputable contractor and you fully understand what you’re getting, it’s time to sign a contract. Make sure that you read and understand the details of the contract. Some states require a cancellation period so at the very least, check to see what your options are for cancelling if you get a better deal or get buyer’s remorse.
Once a contract is signed, your contractor should start working on permitting and interconnection applications. Permitting involves providing the system design, details on the equipment, as well as the installation and electrical plans to your local jurisdiction. They will also need to prepare an interconnection application to allow the utility to review what’s basically a new electrical generation source which is being connected to their grid. Preparing these documents should take no longer than a week, however it can take up to six weeks (or more if there are issues or complications) to get both approvals in hand. Choosing a good contractor who is familiar with the local requirements and processes can help reduce the approval timeframe considerably. Good contractors will also keep you up to date on the current status of these approvals or any issues that arise. Once you’ve gotten approval from your local jurisdiction and utility, it’s time to get your system installed!
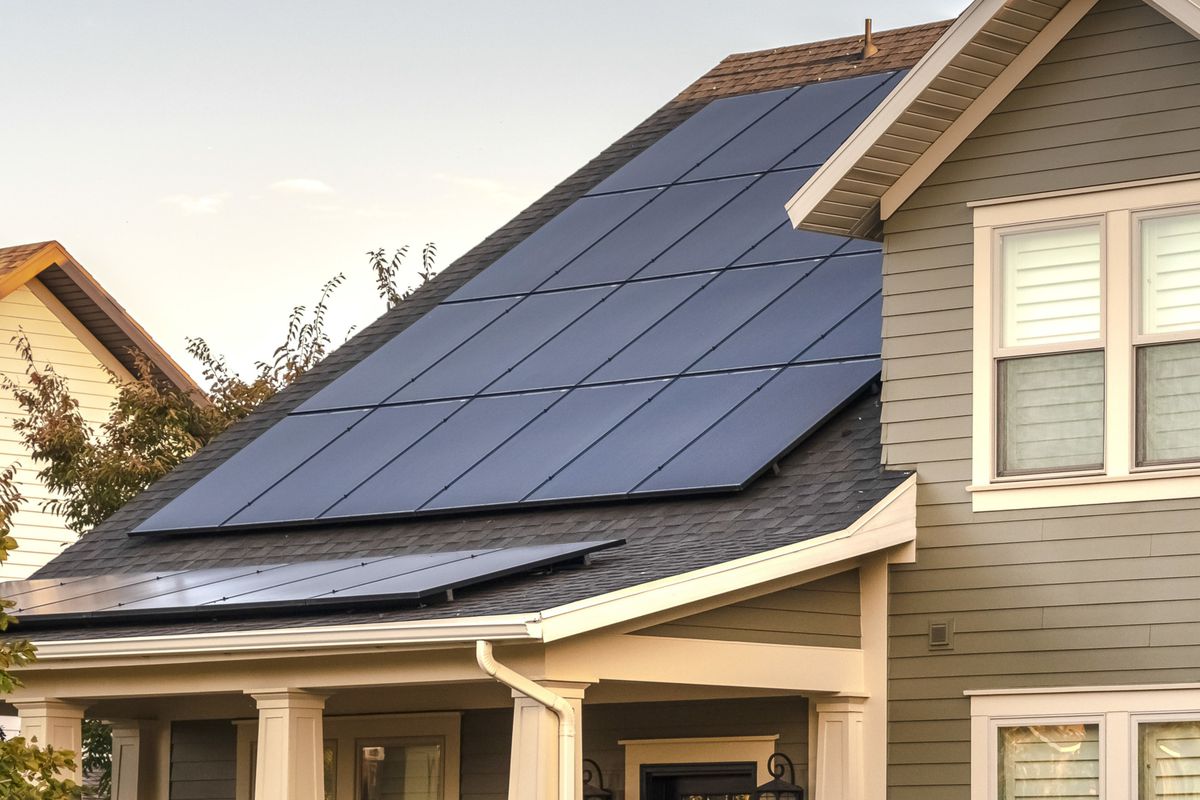
Installation of your home solar panel system
For the purposes of this article, we are assuming that your home solar panel system is being installed on your roof. If your solar panels are being mounted in the ground, much of the same applies, but you can disregard any parts which relate to the attachment to your roof.
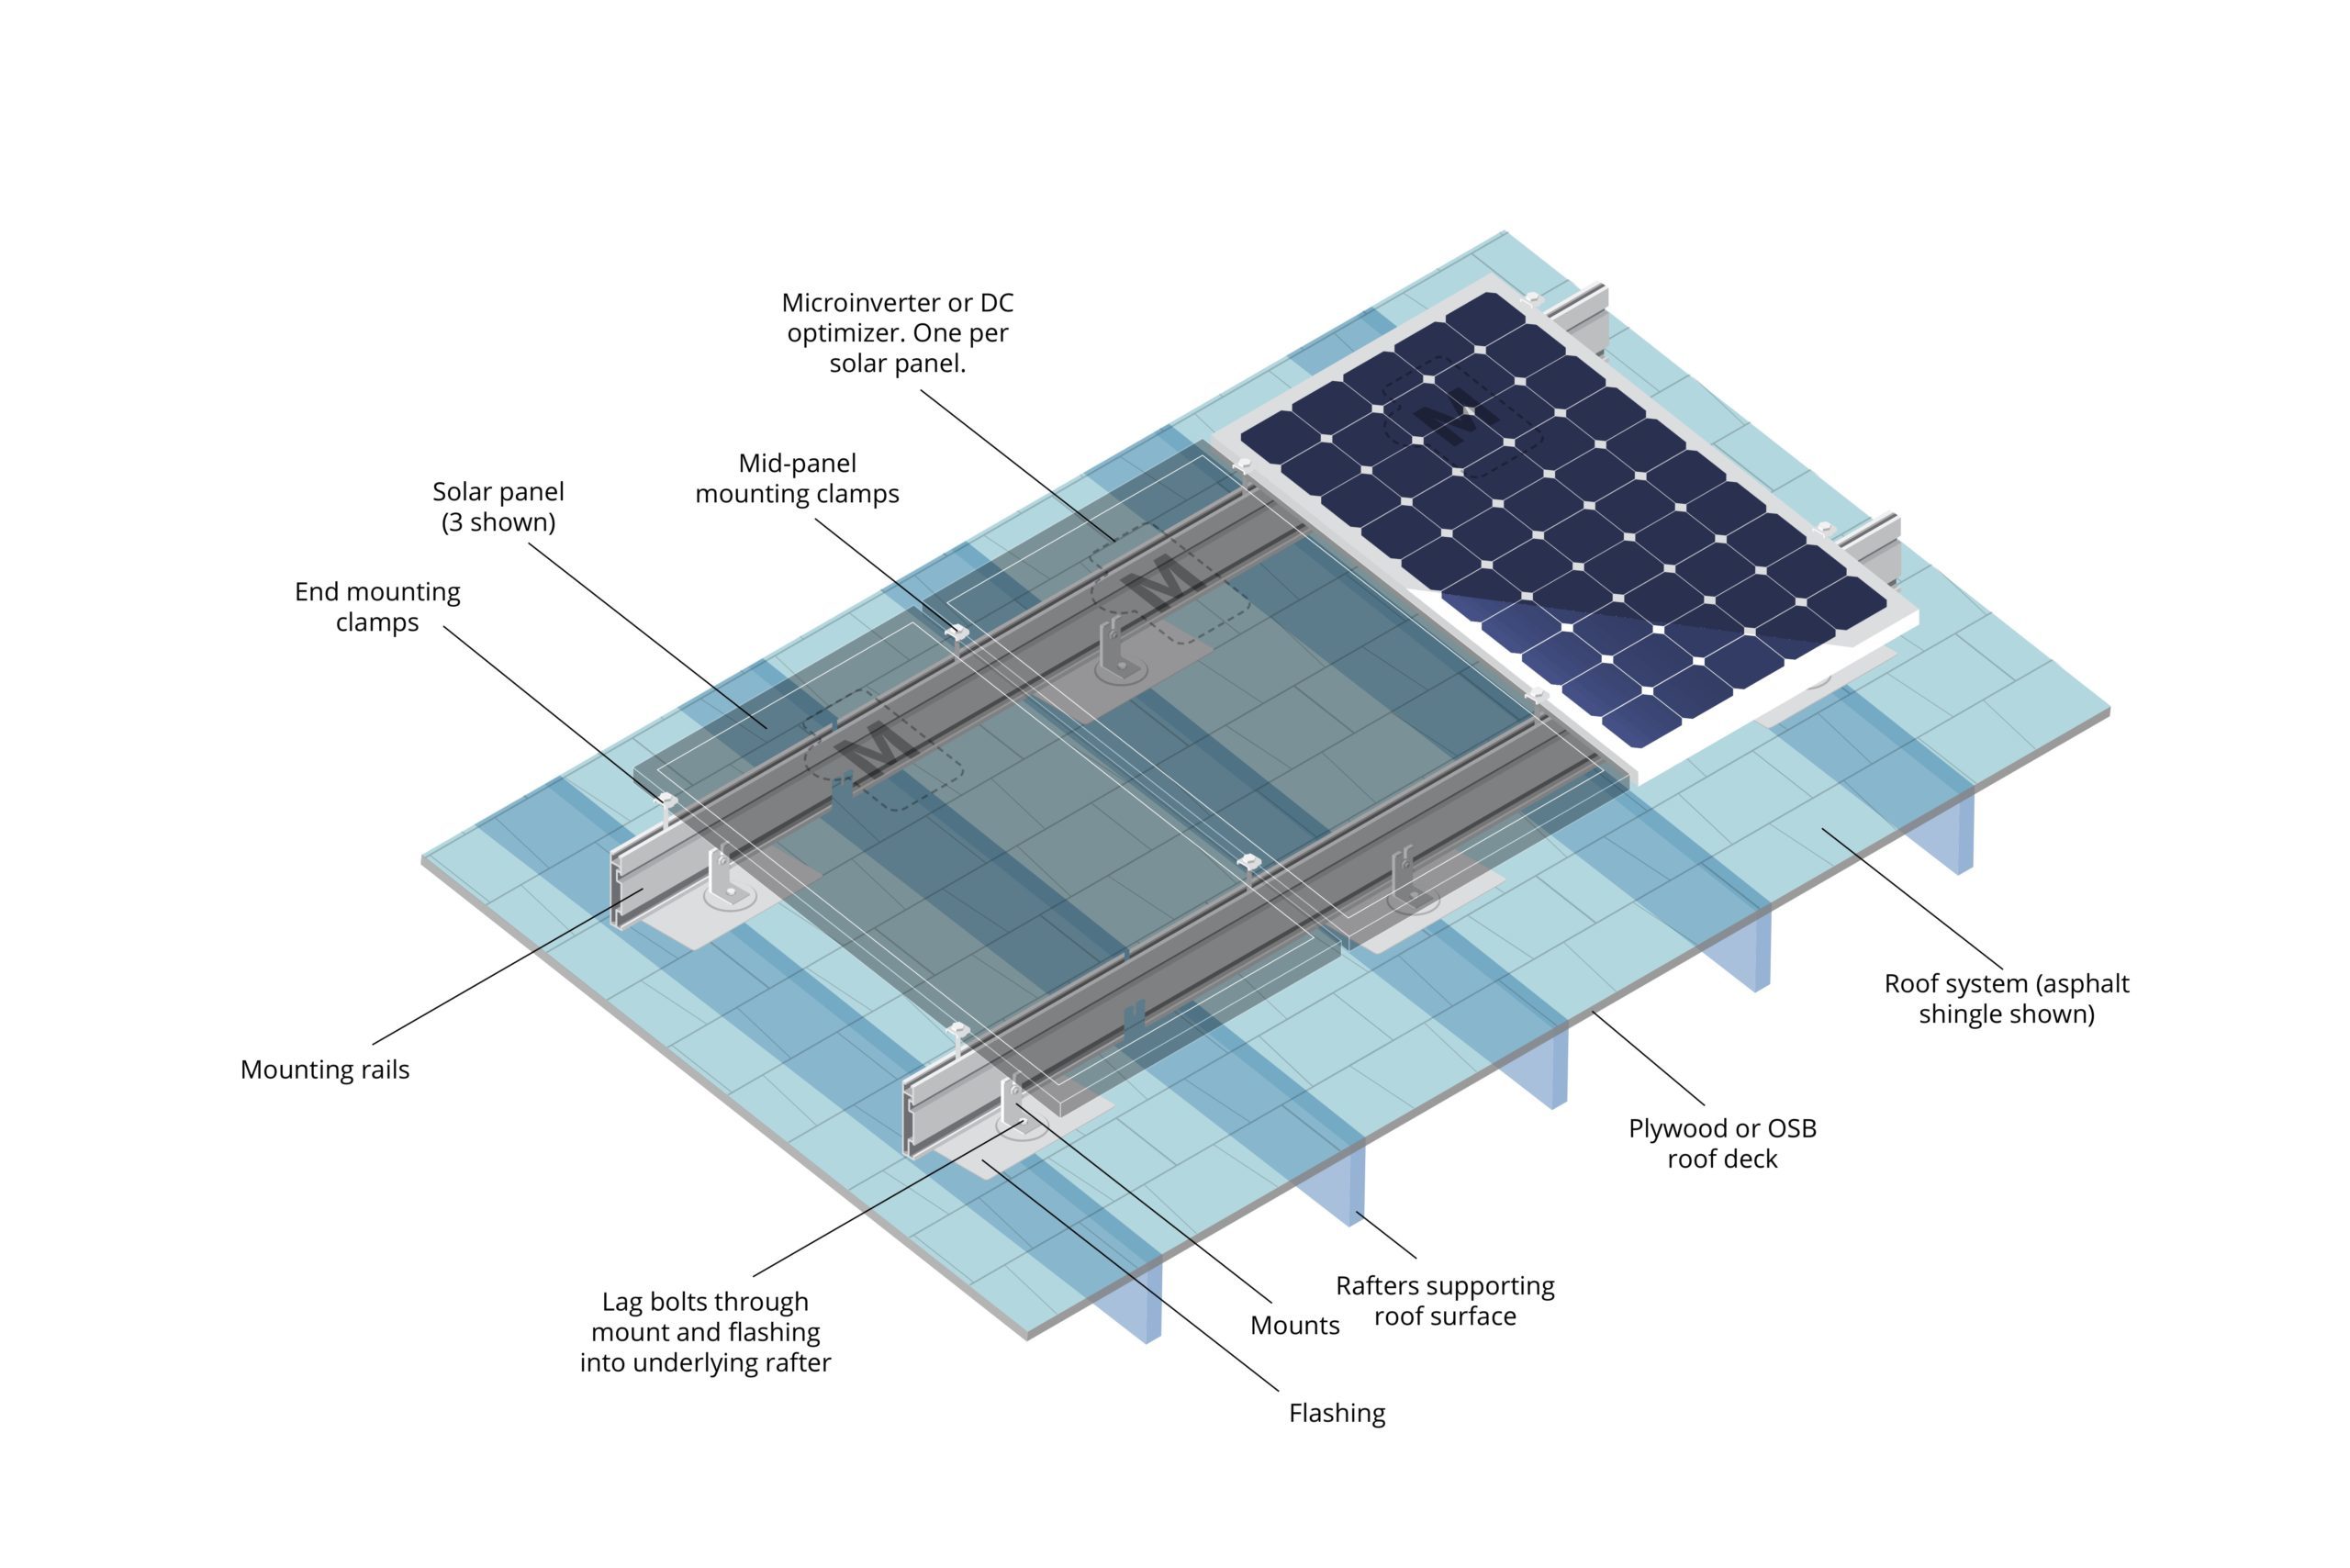
The physical installation of your home solar panel system starts with the contractor measuring the roof space and confirming the dimensions and location of the proposed system vs. the roof. If everything checks out, they’ll move on to laying out the system and marking the attachment points to your roof structure.
Mounting feet are then attached through your roof to anchor the system to your rafters. Since there could be 50 or more of these attachment points, it is critical that a well-designed and good quality flashing product for these mounting feet is used and installed properly in order to prevent these new holes in your roof from leaking. Systems on flat roofs may be anchored to the roof structure or they may be ballasted by using additional weight to keep the system on the roof.
Next, extruded aluminum rails are attached to the mounting feet. Note that some systems are “rail-less” which means that the modules are attached directly to the mounting feet.

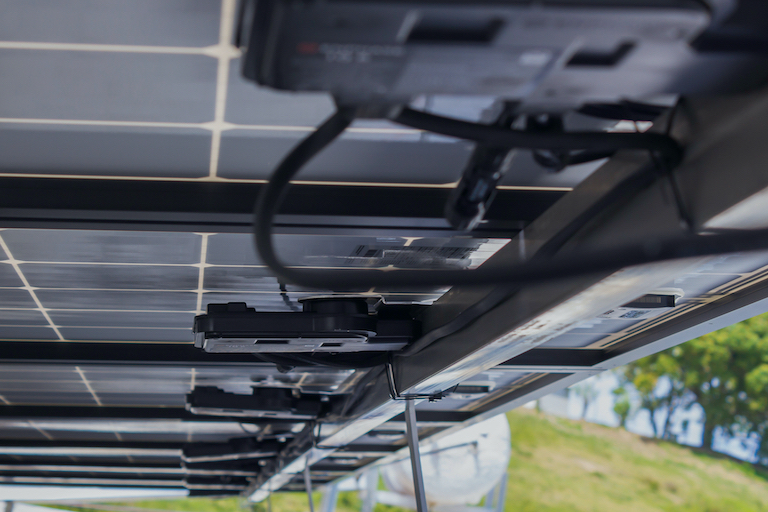
If you have microinverters or DC optimizers, they will then be mounted to the rails or to the module frames and connected to each other.
Next, the solar panels are attached to the rail or directly to the mounting feet with clamps and connected to the microinverters or DC optimizers.

As the solar panels are being installed on the roof, your home’s electrical system is being prepared to connect the solar panels. If DC optimizers are being used, you’ll have a larger inverter and any communications equipment installed. If microinverters are being installed you’ll just have communications equipment to be installed. Typically this equipment is installed near your electrical panel.
Finally, the solar panels are connected to your electric panel through a dedicated circuit breaker.
Installation of your home solar panel system
For the purposes of this article, we are assuming that your home solar panel system is being installed on your roof. If your solar panels are being mounted in the ground, much of the same applies, but you can disregard any parts which relate to the attachment to your roof.
The physical installation of your home solar panel system starts with the contractor measuring the roof space and confirming the dimensions and location of the proposed system vs. the roof. If everything checks out, they’ll move on to laying out the system and marking the attachment points to your roof structure.
Mounting feet are then attached through your roof to anchor the system to your rafters. Since there could be 50 or more of these attachment points, it is critical that a well-designed and good quality flashing product for these mounting feet is used and installed properly in order to prevent these new holes in your roof from leaking. Systems on flat roofs may be anchored to the roof structure or they may be ballasted by using additional weight to keep the system on the roof.
Next, extruded aluminum rails are attached to the mounting feet. Note that some systems are “rail-less” which means that the modules are attached directly to the mounting feet.
If you have microinverters or DC optimizers, they will then be mounted to the rails or to the module frames and connected to each other.
Next, the solar panels are attached to the rail or directly to the mounting feet with clamps and connected to the microinverters or DC optimizers.
As the solar panels are being installed on the roof, your home’s electrical system is being prepared to connect the solar panels. If DC optimizers are being used, you’ll have a larger inverter and any communications equipment installed. If microinverters are being installed you’ll just have communications equipment to be installed. Typically this equipment is installed near your electrical panel.
Finally, the solar panels are connected to your electric panel through a dedicated circuit breaker.
Permission to operate and commissioning
Now that your solar panel system has been installed, your contractor will commission your system. During the commissioning process, your contractor should:
- Turn on the system and ensure that it’s operating correctly with no faults.
- Check the initial power output of the system to ensure that it’s producing the right amount of power given the current conditions.
- Ensure that your monitoring system is working properly and communicating with the inverter manufacturer’s servers.
- Set-up and register your monitoring system with the inverter manufacturer so that you can access the data provided by your system through the inverter manufacturer’s website or mobile app.
- Provide you with documentation to retain for your records including equipment manuals and warranty documents for each as well as the system design and electrical diagram.
After commissioning, you’ll need to pass any remaining inspections and receive permission to operate from your local utility.
Once you’ve received all necessary approvals, you’re ready to turn on your system permanently!
The installation of a home solar system is the easy part. Getting quotes, comparing them and choosing the right solar contractor is the hard part and sets the stage for a successful installation.
Learn how Sentinel has changed the home solar and evaluation process to make it simple for homeowners to compare quotes or get started with a free Solar Assessment.
Have a question about how home solar gets installed? Send us a message and we’ll answer ASAP.
Have a question about how home solar gets installed? Send us a message and we’ll answer ASAP.
Learn about solar
Find honest answers to some of the most commonly asked questions on home solar and clean energy.


Learn about solar
Find honest answers to some of the most commonly asked questions on home solar below.
